Posts

Minimize Multiple Programs in Windows within a Second

Image
Hello Learners, Here once again I'm with some new computer related tips and tricks that will helpful in doing your task in your day to day life. Here we will talk about the windows operating system and I'm sure it is very useful to all of you. Minimize Multiple Programs in Windows within a Second There are many features and the Functionalities in the Windows Operating System and all of them are very useful for its user.They Develop this features for the increasing the productivity in the work and easily complete the Task. So, Here I'm gonna tell you how you can easily minimize the multiple windows simultaneously or within a Second. Because sometimes there are multiple windows are opened and those all are not in use so at that time if you go and minimize them Individually it will take your more time so this is not a good way to Minimize the Windows but here I'm tell you  how you can Easily close the Multiple Windows.  How to Minimize Multiple Windows at once Ste

GodMode in Windows

Image
Hello Learners, I'm here again with new computer related tips and tricks in that will help you to do your task faster and efficiently. So you should know about this windows feature. What is GodMode ? Fig. 1 GodMode in Windows  If you are not familiar with the term God Mode in Windows Operating System then Don't Worry about that here I will explain about this GodMode. GodMode is a Hidden Developer Shortcut in Windows 7 that give the more direct access to feature and functionality to the Operating System. GodMode is helping to collect and give the all of the administrator features or settings at single place that is very useful to the user. How to Activate or Access GodMode in Windows 7  ? Step 1 :Create a New Folder Wherever you want to create the God Mode Folder . For Creating Folder Right-click on Desktop,  then Select New and now Click on Folder . Step 2 : Now, Rename the " New Folder " to:                                                  

Send Message in WhatsApp Without Saving number in Contact

Image
Hello Learners, I'm here again with some  unique tips and tricks that helps you to expand your knowledge and by using this you can do your work easily and efficiently. Here I will talk about the WhatsApp  Most Popular Messaging App in the World and it is very easy to use. you can do sending a message in Smartphone and also in Desktop the process is same. Here I'm doing in the Desktop but you can do in your smartphone it is working.  Send Message in WhatsApp Without Saving  number  in Contact This is the Most Important feature in the WhatsApp because lots of WhatsApp privacy setting restricted to " My Contacts " and that's why you may not want to add or save any random number in your contact Because if you save any random person's number than he/she is able to view your " Profile Picture " and " Status ". Before watching this post maybe you don't know that you can  send  the  Message in WhatsApp  without save  number   in  cont

Difference Between Sign in and Log in

Image
Hello Learners, I'm here once again with some new tips and tricks related to technology and I'm sure it will help you to develop your Technical Knowledge. In this Post  I will tell you about what is  difference  between the term  Log in  and  Sign in . Sometimes you must have had theses question because many website gives theses t wo option Sign in and Log in to you . I'm sure you all are  familiar  with both of the term but you never think that what is the difference between them But don't worry here I will tell you and also clear your doubt. Fig. 1 Log in and Sign in What is Difference between Log in and Sign in  We will try to understand the Difference between the Log in and Sign in through an example of Facebook and Gmail and Now days every smartphone user is know about both of them.Maybe you have notice that Facebook uses Log in, while Gmail uses Sign in. First Let's talk about sign in so that you can find out that the difference between these t

Write Paragraph in 1 Second in the MS-WORD

Image
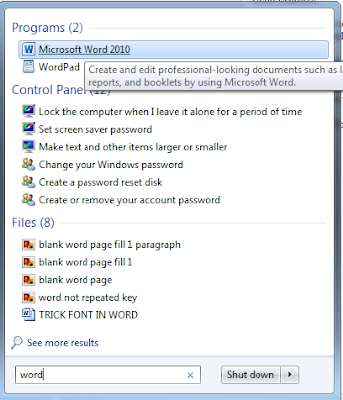
Hello Learners, I'm here with some new technical tips and tricks that will help you to increase your knowledge and for working or doing your task efficiently. In the MS-Word there is a hidden tricks by using that you can easily write any number of paragraphs you want. Here I will show you to write any number of paragraphs by using this trick. Steps are followed below: Step 1: Open MS - Word . Fig. 1 Open MS-Word  Step 2: Now, MS - Word will Display . Fig. 2 MS-Word Displaying Step 3: Enter the code or Put the Code and press Enter key. Fig. 3 Write the Code Step 4: Now, See the Output or Result . Fig. 4 Paragraph Displaying Here, the code is written in Fig. 3 that has a meaning and it says how many numbers of the paragraphs and how many number of the sentences is want to write down. The code =rand(2,5) is say that write down the 2 paragraphs and each should include the 5 Sentences. By using this method you can writes any number of par

Filter key in Windows

Image
Hello Learners, I'm back with some new tips and tricks related to the windows operating system which will help you a lot for doing your work in efficient way. There is an feature or trick for the keyboard that is most useful for everyone. Because when you work in the MS-Word, Notepad or in MS-Power Point sometime unintentionally any key is pressed and it entered in the document for the repeated time and it is not good for the working in the document . also if in our home there maybe a child that can also press the key so by enabling this feature it will help you. See when unintentionally key pressed in the documents .(here f is repeated time)  Fig. 1 Repeated key in Document So, there is the way to stop the pressing the repeated key is the enabling the Filter Key in the Windows.By enabling the Filter Key there will not the key repeated . There are the Steps to Enable the Filter Key . Steps 1: Open Control Panel . Fig. 2 Open Control panel

Tricks in Windows Operating System

Image
Hello Learners, I'm once again here with a new tips and tricks of the Windows which we help you to do your task efficiently and quickly. Here I'll Show you how to set the Image as an Icon on the Hard Disk Drive or HDD  in Windows Operating System. For doing these first of all you have to  Choose  the  Image  for setting as the  HDD Icon  but  Image extensio n must be  Bitmap  ( .bmp ). If You don't know how to make image extension bitmap (.bmp) here it is illustrated.  Steps are followed below with Screenshots . Step 1 : Open the image with a Paint of Windows. Fig. 1 Open Image in Paint Step 2 : Save as this image as bmp picture . Fig. 2 Save as bmp Picture Step 3 : Name an image . Fig. 3 Name the Image Now, the Image is ready for the use here you can see the Image format or extension is changed from .png to .bmp. You can see the comparison between both of image extension. .  Fig. 4 Comparing Image Extension

3 Amazing Websites on Google

Image
Hello Learners, I'm back with some new tips and tricks which will helpful in the increasing your technical skills and knowledge. There are some most useful websites on internet which will help you a lot to do your work fast and efficient. 3 Amazing Websites on Google 1. The Faces of Facebook On this Website when you visit it will show you the Million of Facebook users at single place and when you zoom it then you can clearly see all of the users. so here you can easily see the Facebook users and so that this is a very good Website. Steps are Follow. 1. Open Google and Search The faces of Facebook. Fig. 1 Search The Faces of Facebook  2. Now, Click on the First link . Fig. 2 Click on First Link 3. Now you will see a page with lots of Facebook Profile . Fig. 3 Million of Facebook profile 4. Now, Zoom it  for viewing the Profile . Fig. 4 See the Profiles 2. Hacker Typer In this website you can do a fun with completing your dream

Tricks on Google (Part-2)

Image
Hello Learners, I'm back with some new tips and tricks of Google which will helps you to do your work efficiently and to increasing your knowledge. Top 5 Google Tricks. 1. Google Pacman In the Google there are lots of game offers by the google and you can easily play all that game and they are very popular games. Steps are follow. 1. Open Google and Search Google Pacman. Fig. 1 Search Google Pacman  2. Google Pacman will Display . Then You can start the game by clicking on the Play Button. Fig. 2 Google Pacman Game 2. Google Underwater. In the Google there is a Google Underwater it is a one kind of same as google search engine page but in this page everything will be appear inside the water that's why it is called Google underwater.   Steps are follow. 1.Open Google and Search Google Underwater. Fig. 3 Search Google Underwater 2. Click on the First Link . Fig. 4 Click on First link 3. Google Underwater Display.